


Two Easy Ways to Start Earning Rewards!
Become a member today! Members-only pricing and offers, personalized care notifications, Vital Care points back on every purchase and more!
 Become a credit card member today!
Earn 2X Pals Rewards points at Petco
when you use Petco Pay!APPLY NOWLearn More About Petco Pay Benefits
How to Teach a Dog to Shake Hands: 10 Easy Steps
Published on May 29th, 2024
Updated on June 18th, 2026

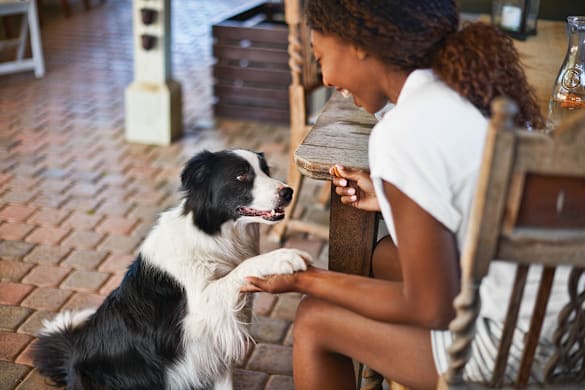
Follow our guide on "how to teach a dog to shake hands". Our guide will help you with the simple & fun dog trick of teaching a dog to shake with both paws!
“Shake” is a classic and fun dog training prompt that is relatively easy to teach. Like many cues, it requires repetition, positive reinforcement and enthusiastic responses to effort and success. Once you understand a few straightforward steps for how to teach a dog to shake, you and your pet can begin learning this charming greeting together.
As one of the most fun tricks to teach your dog, “shake” is a great way to spend time together, building their skills and your joint bond. Practice this trick in various locations, including environments with distractions, to increase their ability to perform this cue. Reward-based learning is often the most successful, so make sure you have plenty of dog training treats on hand before you begin.
You can use the same steps for both right and left paws if you want your dog to know both. It might take them a while to adjust from one to the other, so be patient and offer much praise and many treats. If they give you the wrong paw at first, wait without speaking for them to correct themselves, then provide positive reinforcement when they get it right.
Tips and Questions About Teaching Your Dog to Shake
How to Teach a Dog to Shake Hands: Step-by-Step
When to Start Teaching Your Dog to Shake
Dogs can learn to offer their paw at any age — but starting after your dog has a solid grasp of foundational cues gives you the best shot at success. Before you begin, make sure your dog can sit reliably and hold attention on you. That sitting position is exactly where the shake cue starts, so mastering it first isn't just good practice — it's a practical prerequisite.
If you have a puppy, don't rush. Build confidence with simpler cues first, then layer in shake once those feel easy and consistent.
What to Know Before You Begin
Teaching your dog to shake is as much about your preparation as it is about your dog's learning. A few things to have in place before your first session:
- Short, frequent sessions work best. Five to ten minutes at a time keeps your dog engaged without tipping into frustration or fatigue.
- Stock up on small, high-value dog treats. Treats are your primary communication tool here — they tell your dog clearly and immediately that a behavior was correct.
- Practice patience and praise. Your dog is problem-solving in real time. Enthusiasm from you makes that process faster and more enjoyable for both of you.
- Consider marker training. Some pet parents find a clicker — or a consistent verbal marker like "yes!" — makes timing much cleaner. A marker bridges the gap between the moment your dog does the right thing and the moment the treat arrives. If you're new to it, spend a session or two pairing the click or word with a treat before you start teaching shake. It's a small investment that pays off quickly.
How to Teach a Dog to Shake: 10 Steps
These steps work at home or out in the world. Practicing in different environments — with different sounds and mild distractions around — actually helps your dog build better focus and generalize the cue so it works everywhere, not just in your living room.
Step 1: Ask your dog to sit. Start every session here. Your dog should be in a calm, attentive sit before you extend your hand. If they can't hold the sit, take a step back and reinforce that foundation first.
Step 2: Extend your hand, palm facing up. Hold your open hand out toward your dog at roughly paw height. Look at your dog, but stay quiet — no verbal cue yet. You're inviting them to figure out what you want, and silence keeps the signal clean.
Step 3: Wait. Let your dog problem-solve. Your dog will likely sniff your hand, maybe lick it. That's fine — keep your hand steady and your expression calm. Do not grab their paw or lift it to your hand. The goal is for your dog to offer the paw voluntarily. Most dogs will eventually paw at your hand out of curiosity or mild frustration. The moment that paw makes contact, mark it (click or say "yes!") and reward generously with praise and a treat.
Step 4: Repeat and build the pattern. Run through the same sequence — sit, extended hand, quiet wait, paw contact, mark, reward. Repetition is how the association forms. Keep your energy consistent and upbeat.
Step 5: Raise the criteria slightly. Once your dog is reliably pawing your hand, begin waiting a half-beat longer before you mark and reward. This small pause builds your dog's confidence that the behavior itself — not just the motion — is what earns the treat. Don't rush this step.
Step 6: Wait for the paw to rest on your palm. Now refine the behavior. Hold off on marking until your dog's paw is actually resting on your palm, not just tapping or swiping at it. This distinction teaches your dog that a deliberate, placed paw is the goal. Be patient — some dogs nail this quickly, others need a few sessions.
Step 7: Add the verbal cue. Once your dog is consistently placing their paw on your open palm, it's time to name the behavior. "Shake" is the classic choice, but you can use "paw," "high five," or anything you'll say the same way every time. Timing matters here: say the cue just before you sense your dog is about to lift their paw, then mark and reward when they do. Repeating this sequence pairs the word with the action in your dog's mind.
Step 8: Shift your hand to the handshake position. Gradually rotate your hand from palm-up to a traditional sideways handshake orientation. Use your verbal cue. Your dog should follow along — but if they look confused, return to Step 7 for a few more repetitions before trying again. Never push forward when your dog is uncertain; confidence built slowly is confidence that lasts.
Step 9: Add the shake motion. When your dog places their paw in your hand in the sideways position, gently move your hand up and down in a natural handshake motion. This is a new element for your dog, so treat and praise it just as enthusiastically as you did the earlier steps. Keep the motion gentle and brief at first.
Step 10: Fade the treats gradually. Once your dog performs the full shake — sit, paw placed, handshake motion — reliably and with ease, you can begin phasing out food rewards. Shift to intermittent treating (rewarding every few repetitions rather than every time), then to praise and affection alone. Your dog now understands the cue. The behavior is theirs to keep.
Quick-Reference: The Shake Training Progression
| Stage | What You're Teaching | Key Signal to Move Forward |
|---|---|---|
| Steps 1–3 | Paw-to-hand contact (any touch) | Dog paws your hand without prompting |
| Steps 4–6 | Deliberate, placed paw on palm | Paw rests fully on palm consistently |
| Step 7 | Pairing the verbal cue with the action | Dog lifts paw when they hear the cue |
| Step 8 | New hand orientation (sideways) | Dog follows cue in handshake position |
| Step 9 | Full handshake motion | Dog holds paw steady through the motion |
| Step 10 | Fading food rewards | Dog performs cue for praise alone |
A Note on Treats and Rewards
Dog treats are an essential training tool — but keep them small (pea-sized or smaller) so your dog stays motivated across a full session without filling up. As a general guideline, treats should make up no more than 10% of your dog's daily caloric intake. If you have questions about how training treats fit into your dog's overall diet, your veterinarian is the right resource.
Dog Training at Home
It’s not difficult to learn how to teach your dog to shake hands at home. Dog training at home helps you bond with your pet and sets a foundation of trust and positive interaction.
Basic Dog Training Needs and Equipment
With so many fun tricks to teach your dog, you may be wondering where to begin. Here are some guidelines for the things you need to teach your dog new tricks.
- Establish a schedule. Proper training of any kind requires structure, and introducing routine helps your dog adhere to daily patterns. Choose one or two basic cues to work on every day for however many weeks it takes—typically about six weeks.
- Start with the basics. It’s a good idea to start with the fundamental cues like sit, down, stay, come and off. Once these are mastered, it will be much easier to move onto other tricks to teach your dog, like shake and roll over.
- Decide on rewards. Dog training treats, toys and dog training clickers are tools you can use for reward-based positive reinforcement training. This method is considered highly effective and one of the best ways to train.
- Find the right tricks. You want to be sure to work on tricks that are right for your dog’s age and abilities. Don’t try to get too advanced with young puppies, for instance, or don’t begin with touch interactions for anxious pets.
- Review and repeat. Once your dog has learned commands and tricks, it’s important to reinforce that training with check-ins a few times a week.
Dog Training Classes
If you’re feeling overwhelmed learning how to teach your dog to shake or need help teaching basic cues, you might benefit from dog and puppy training classes. They can help you establish long-term techniques and behaviors. In-store dog training classes with other dogs are a chance to socialize your pet and get them used to following cues while distracted or away from home.
One-on-one classes are a good option for more high-energy pets, and you can even sign up for online dog and puppy training courses. A professional trainer at a reputable Petco Pet Care Center will help troubleshoot any problems you run into while teaching your dog to shake—or any other fun tricks.
The Benefits of Finding Tricks to Teach Your Dog
Is trick training good for dogs?
Training your dog tricks like roll over, shake, back up and take a bow helps create a trusting relationship. It can also help your dog’s well-being by promoting concentration, balance, flexibility and opportunities for praise. Getting your dog used to following cues establishes good behavior, which leads to more rewarding social interactions for you and your pet.
Learning how to teach a dog to shake enables you to set routine interactions with your pup that have lasting results. Your dog will respond to the positive reactions they receive from guests, as well as the attention you show them every time you perform a trick together.
“Shake” is just one of the many fun tricks to teach your dog. It’s one of the best-known and loved tricks, and once your dog masters it, you can impress guests together. Trick training is a constructive way to spend time with your dog, teach good behavior and results in many charming future interactions with your pet.
Frequently Asked Questions
At what age can I start teaching my dog to shake? Dogs can learn to offer their paw at any age, but starting as early as puppyhood — once your dog reliably knows how to sit and hold your attention — gives you the strongest foundation. Older dogs are equally capable learners; patience and consistent positive reinforcement are what matter most, regardless of age.
Does my dog need to know "sit" before learning to shake? Yes. Because the shake cue begins from a seated position, your dog should have a solid, reliable "sit" before you introduce this trick. Mastering foundational cues like sit, stay and come first makes every subsequent trick easier to build on.
How long does it take to teach a dog to shake hands? Most dogs begin to understand the concept within a few short sessions, but consistent, reliable performance typically develops over several weeks of daily practice. Plan for sessions of just a few minutes at a time — short, frequent repetitions are far more effective than long, infrequent ones.
What rewards work best when teaching a dog to shake? Small, high-value dog training treats are the most effective reward for most dogs, especially in the early stages of learning. Clicker or marker training — pairing a click sound with a treat the moment your dog performs the desired behavior — can sharpen the timing of your feedback and help your dog understand exactly which action earned the reward.
Can I teach my dog to shake with both paws? Absolutely. You can use the same 10-step process for both the right and left paw. Introduce the second paw only after your dog is confident with the first, and be patient — it may take a little time for your dog to distinguish between the two. If he offers the wrong paw, wait silently for him to self-correct, then reward immediately when he gets it right.
When should I stop using treats for the shake cue? Once your dog performs the shake cue confidently and consistently — lifting his paw reliably on the verbal cue alone — you can gradually phase out food rewards. Continue offering verbal praise and the occasional treat to keep the behavior strong over time. If performance starts to slip, simply return to more frequent treat reinforcement for a few sessions.
Troubleshooting: Why Won't My Dog Shake? (Common Mistakes & Fixes)
Even with patience and plenty of treats, you may hit a snag. Use this table to diagnose what's going wrong and get back on track quickly.
| Problem | Likely Cause | Fix |
|---|---|---|
| Dog sniffs your hand but never lifts a paw | Moving too fast; dog hasn't made the connection yet | Return to step 2 — hold your palm out silently and wait longer. Most dogs will eventually paw out of curiosity. Never grab or lift the paw for them. |
| Dog sits but immediately gets up | Sit cue isn't solid enough yet | Reinforce "sit" and "stay" in short, separate sessions before returning to shake practice. Shake requires a stable sit as its foundation. |
| Dog offers the wrong paw | Confusion between left and right, or defaulting to a habit | Stay quiet and wait without reacting. The moment the correct paw lifts, mark and reward immediately. Teach one paw fully before introducing the other. |
| Dog paws frantically at your hand instead of resting paw calmly | Rewarding the paw-swipe motion rather than a resting paw | Withhold the treat until the paw rests fully in your palm (step 6). Reward calm placement only, not the swipe. |
| Dog performs well at home but ignores the cue elsewhere | Cue hasn't been generalized to new environments | Practice in at least three different locations with gradually increasing distractions — a quiet yard, then a park, then around guests. Keep sessions to 3–5 minutes. |
| Dog loses interest mid-session | Sessions are too long or treats aren't motivating enough | Cap sessions at 5 minutes. Experiment with higher-value rewards (small pieces of cooked chicken or a favorite soft treat) to rebuild enthusiasm. |
| Dog regresses after previously mastering the cue | Inconsistent practice schedule or a gap in training | Return to the last step where the dog was confident and rebuild from there. Aim for brief review sessions two to three times per week to maintain learned cues. |
| Dog seems anxious or pulls paw away | Touch sensitivity or a negative association with paw handling | Slow down entirely. Begin by simply touching the paw briefly, rewarding calm acceptance, before asking for any lift. Consult your veterinarian if anxiety seems significant. |
Frequently Asked Questions
At what age can I start teaching my dog to shake? Dogs can learn to offer a paw at any age. Puppies can begin once they have a reliable "sit" — typically after a few weeks of basic cue work. Starting early builds good habits, but older dogs are equally capable of learning this trick with consistent, reward-based practice.
Do I need a clicker to teach my dog to shake? No — a clicker is a helpful tool but not required. A consistent verbal marker like "yes!" works just as well. The key is marking the exact moment your dog's paw meets your palm, then following immediately with a treat. If you'd like to explore marker training further, Petco's knowledgeable trainers can walk you through the basics in a dog and puppy training class.
How long does it take a dog to learn to shake? Most dogs begin to make the connection within a few short sessions. Reaching consistent, confident performance typically takes one to several weeks of daily 3–5 minute practice sessions, depending on the individual dog's age, temperament and prior training experience.
Should I teach my dog to shake with both paws? You can, and it's a fun extension of the trick. Teach one paw fully before introducing the other. When switching sides, your dog may offer the familiar paw out of habit — wait silently for the correct one, then reward generously. Patience is especially important during this transition.
When should I stop using treats for the shake cue? Begin fading treats gradually once your dog performs the cue confidently and consistently — not all at once. Swap to intermittent treat rewards while still offering verbal praise and petting. Removing treats too early can cause the behavior to fade, so make sure the cue is truly solid first.
What if my dog is too anxious for paw-touch training? Some dogs, particularly those who are touch-sensitive or have had limited handling as puppies, may find paw contact stressful. Start by simply resting your hand near the paw and rewarding calm behavior, building up slowly over many sessions. If your dog shows persistent anxiety or stress signals, consult your veterinarian before continuing, as they can help rule out any underlying discomfort or recommend a certified trainer for additional support.
This article was created with assistance from AI tools and reviewed for accuracy by Petco's content team.

